


Web services are application components which communicate using open protocols. Using Web Services we can publish our application's functions to everyone. This tutorial provides step by step instructions to develop Web Services using Axis2 Web Services / SOAP / WSDL engine and Eclipse IDE. Let's start.
1.1. First you need to set up the development environment. Following things are needed if you want to create Web Services using Axis2 and Eclipse IDE.
1) Apache Axis2 Binary Distribution - Download
2) Apache Axis2 WAR Distribution - Download
3) Apache Tomcat - Download
4) Eclipse IDE – Download
5) Java installed in your Computer – Download
1.2. Then you have to set the environment variables for Java and Tomcat. There following variables should be added.
![]()
There select Apache Tomcat v6.0 and in the next window browse your Apache installation directory and click finish.
1.4. Then click on the Web Service –-> Axis2 Preferences and browse the top level directory of Apache Axis2 Binary Distribution.
2.1 First create a new Dynamic Web Project (File --> New –-> Other…) and choose Web --> Dynamic Web Project.
2.2 Set Apache Tomcat as the Target Runtime and click Modify to install Axis2 Web Services project facet.

2.3 Select Axis2 Web Services
2.4 Click OK and then Next. There you can choose folders and click Finish when you are done.
Now you can create a Java class that you would want to expose as a Web Service. I’m going to create new class called FirstWebService and create public method called addTwoNumbers which takes two integers as input and return the addition of them.
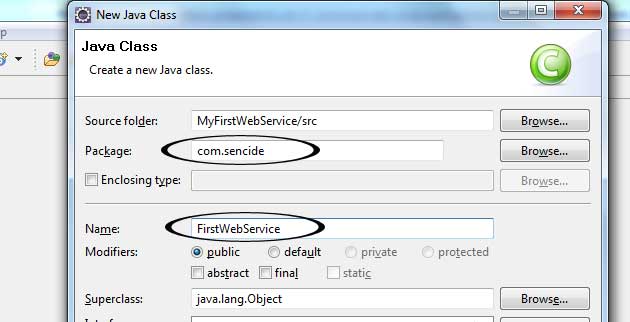
3.1 Right Click on MyFirstWebService in Project Explorer and select New –-> Class and give suitable package name and class name. I have given com.sencide as package name and FirstWebService as class name.

3.3 Select the FirstWebService class as service implementation and to make sure that the Configuration is setup correctly click on Server runtime.
3.4 There set the Web Service runtime as Axis2 (Default one is Axis) and click Ok.

3.5 Click Next and make sure Generate a default service.xml file is selected.

3.6 Click Next and Start the Server and after server is started you can Finish if you do not want to publish the Web service to a test UDDI repository.
You can go to http://localhost:8888/MyFirstWebService/services/listServices to see your running service which is deployed by Axis2. You can see the WSDL by clicking the link FirstWebService.
We have to use Eclipse every time when we want to run the service if we do not create .aar (Axis Archive) file and deploy it to the server. So let’s see how we can create it.
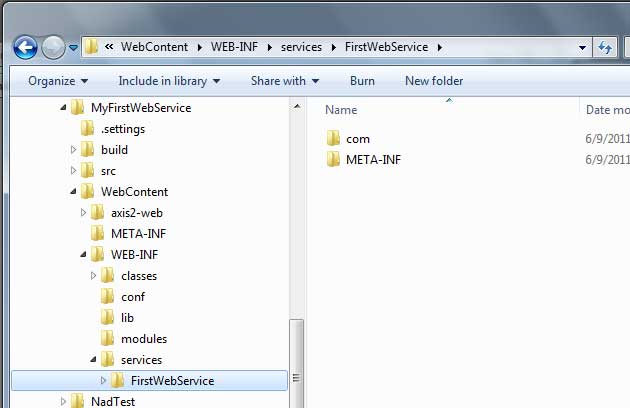
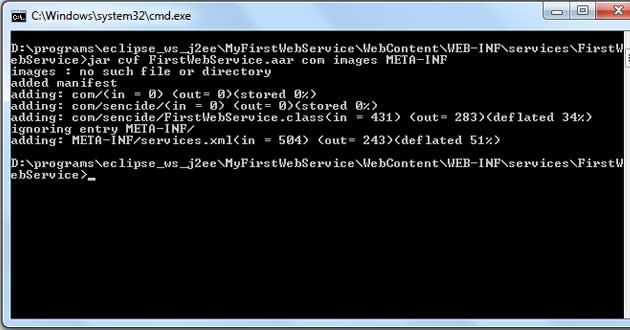
4.1 In your eclipse workspace and go to MyFirstWebService folder and there you can find our web service inside services folder. Go to that directory using command prompt and give following command. It will create the FirstWebService.aar file there.
4.2 Then copy the axis2.war file you can find inside the Apache Axis2 WAR Distribution (You downloaded this at the first step) to the webapps directory of Apache Tomcat. Now stop the Apache Tomcat server which is running on Eclipse IDE.

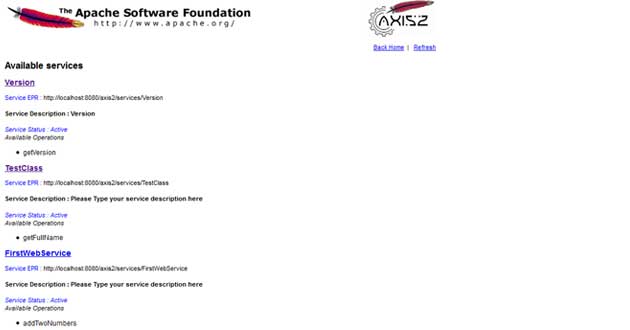
4.3 Using command prompt start the Apache Tomcat (Go to bin directory and run the file startup.bat). Now there will be new directory called axis2 inside the webapps directory. Now if you go to the http://localhost:8080/axis2/ you can see the home page of Axis2 Web Application.
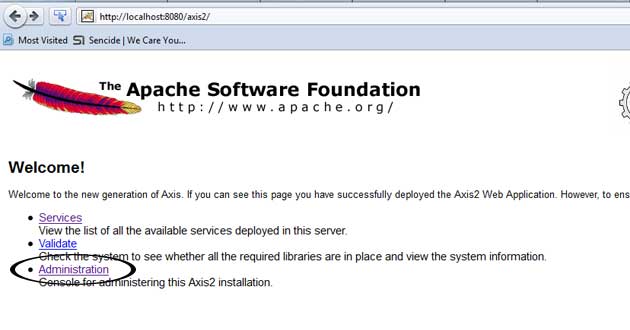
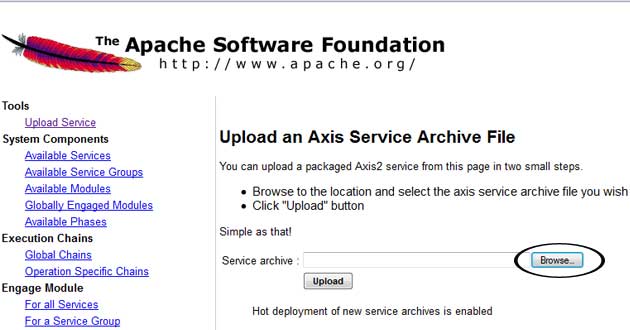
4.4 Then click the link Administration and login using username : admin and password : axis2. There you can see upload service link on top left and there you can upload the created FirstWebService.aar file. This is equal to manually copping the FirstWebService.aar to webapps\axis2\WEB-INF\services directory.
4.5 Now when you list the services by going to http://localhost:8080/axis2/services/listServices you should be able to see our newly added service.
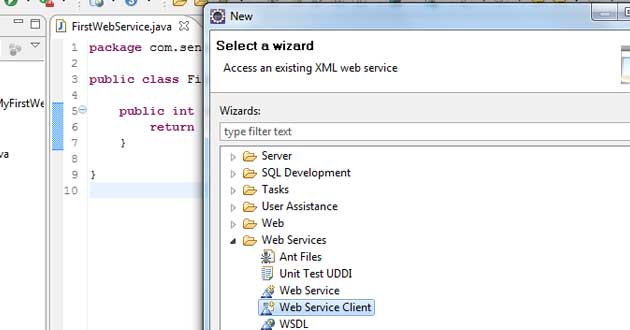
5.1 Select File --> New --> Other… and choose Web Service Client
5.2 Set he newly created Axis2 Web service (http://localhost:8080/axis2/services/FirstWebService?wsdl) as the Service definition. Then configure the Server runtime as previously and click finish.

5.3 This will generate two new classes called FirstWebServiceStub.java and FirstWebServiceCallbackHandler.java. Now we can create test class for client and use our web service. Create new class called TestClient.java and paste following code.
Download the Eclipse project of the above example (Password:sara)
1. Setup the Development Environment
1.1. First you need to set up the development environment. Following things are needed if you want to create Web Services using Axis2 and Eclipse IDE.
Some Eclipse versions have compatibility issues with Axis2. This tutorial is tested with Apache Axis2 1.5.2, Eclipse Helios and Apache Tomcat 6.
1) Apache Axis2 Binary Distribution - Download
2) Apache Axis2 WAR Distribution - Download
3) Apache Tomcat - Download
4) Eclipse IDE – Download
5) Java installed in your Computer – Download
1.2. Then you have to set the environment variables for Java and Tomcat. There following variables should be added.
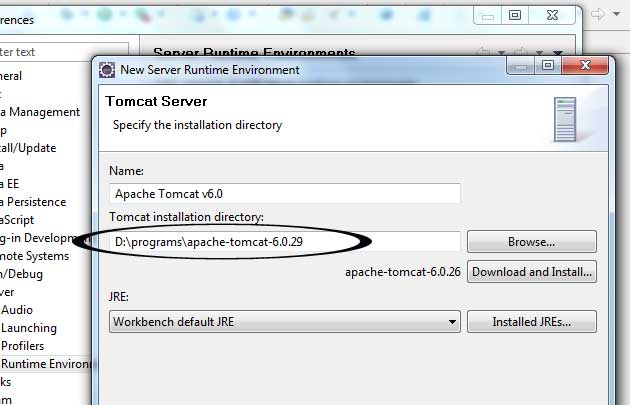
JAVA_HOME :- Set the value to jdk directory (e.g. C:\Program Files\Java\jdk1.6.0_21)
TOMCAT_HOME :- Set the value to top level directory of your Tomcat install (e.g. D:\programs\apache-tomcat-6.0.29)
PATH :- Set the value to bin directory of your jdk (e.g. C:\Program Files\Java\jdk1.6.0_21\bin)
1.3. Now you have to add runtime environment to eclipse. There go to Windows –-> Preferences and Select the Server --> Runtime Environments.

There select Apache Tomcat v6.0 and in the next window browse your Apache installation directory and click finish.

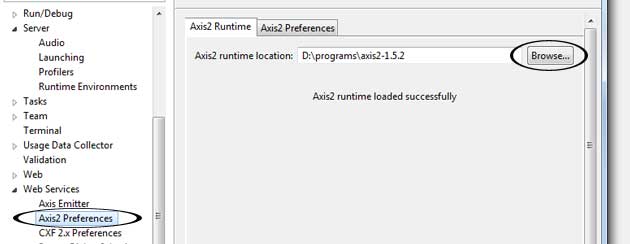
1.4. Then click on the Web Service –-> Axis2 Preferences and browse the top level directory of Apache Axis2 Binary Distribution.

2. Creating the Web Service Using Bottom-Up Approach
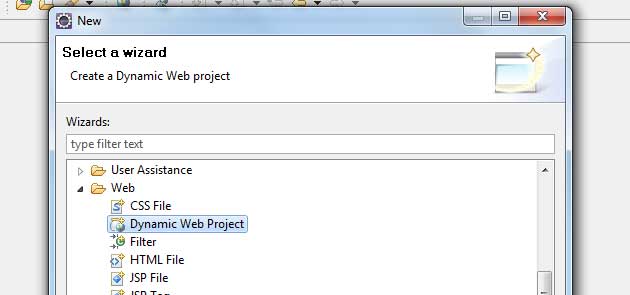
2.1 First create a new Dynamic Web Project (File --> New –-> Other…) and choose Web --> Dynamic Web Project.

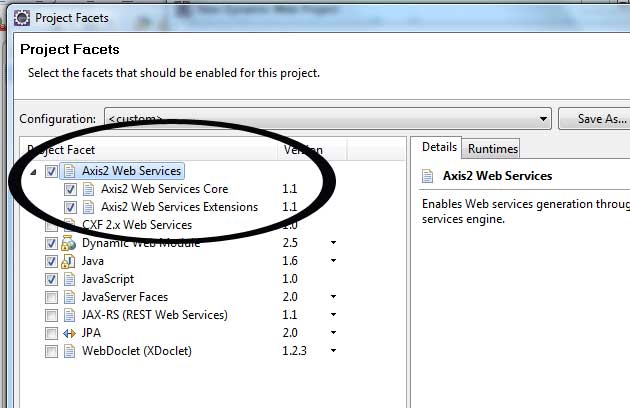
2.2 Set Apache Tomcat as the Target Runtime and click Modify to install Axis2 Web Services project facet.

2.3 Select Axis2 Web Services

2.4 Click OK and then Next. There you can choose folders and click Finish when you are done.
3. Create Web Service Class
Now you can create a Java class that you would want to expose as a Web Service. I’m going to create new class called FirstWebService and create public method called addTwoNumbers which takes two integers as input and return the addition of them.
3.1 Right Click on MyFirstWebService in Project Explorer and select New –-> Class and give suitable package name and class name. I have given com.sencide as package name and FirstWebService as class name.

package com.sencide;
public class FirstWebService {
 public int addTwoNumbers(int firstNumber, int secondNumber){
  return firstNumber + secondNumber;
 }
}
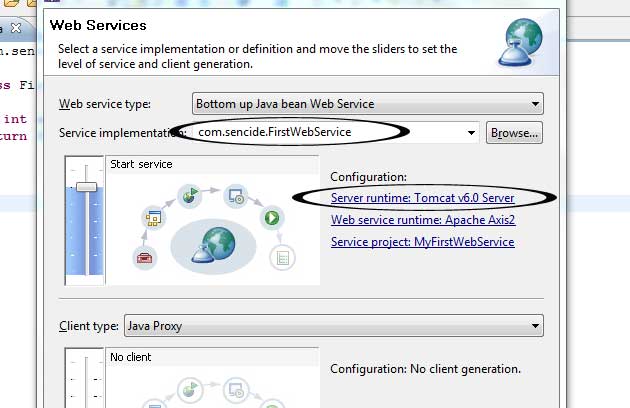
3.2 Then, select File --> New –-> Other and choose Web Service.
3.3 Select the FirstWebService class as service implementation and to make sure that the Configuration is setup correctly click on Server runtime.

3.4 There set the Web Service runtime as Axis2 (Default one is Axis) and click Ok.

3.5 Click Next and make sure Generate a default service.xml file is selected.

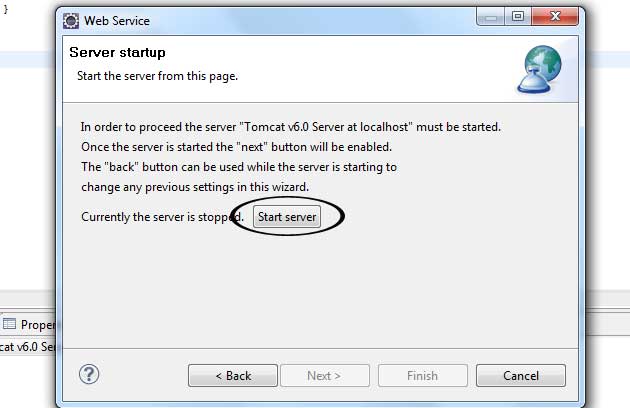
3.6 Click Next and Start the Server and after server is started you can Finish if you do not want to publish the Web service to a test UDDI repository.

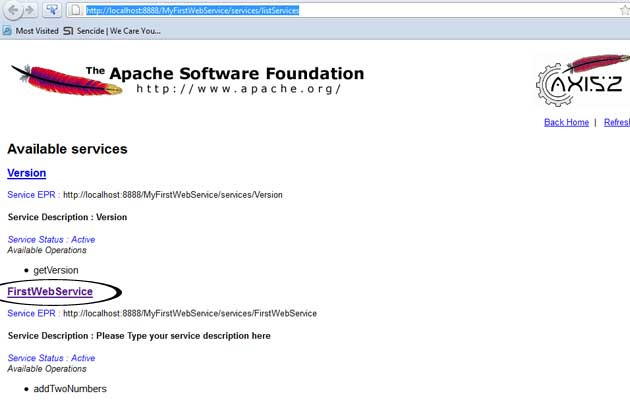
You can go to http://localhost:8888/MyFirstWebService/services/listServices to see your running service which is deployed by Axis2. You can see the WSDL by clicking the link FirstWebService.

We have to use Eclipse every time when we want to run the service if we do not create .aar (Axis Archive) file and deploy it to the server. So let’s see how we can create it.
4. Create .aar (Axis Archive) file and Deploying Service
4.1 In your eclipse workspace and go to MyFirstWebService folder and there you can find our web service inside services folder. Go to that directory using command prompt and give following command. It will create the FirstWebService.aar file there.
jar cvf FirstWebService.aar com META-INF


4.2 Then copy the axis2.war file you can find inside the Apache Axis2 WAR Distribution (You downloaded this at the first step) to the webapps directory of Apache Tomcat. Now stop the Apache Tomcat server which is running on Eclipse IDE.

4.3 Using command prompt start the Apache Tomcat (Go to bin directory and run the file startup.bat). Now there will be new directory called axis2 inside the webapps directory. Now if you go to the http://localhost:8080/axis2/ you can see the home page of Axis2 Web Application.

4.4 Then click the link Administration and login using username : admin and password : axis2. There you can see upload service link on top left and there you can upload the created FirstWebService.aar file. This is equal to manually copping the FirstWebService.aar to webapps\axis2\WEB-INF\services directory.

4.5 Now when you list the services by going to http://localhost:8080/axis2/services/listServices you should be able to see our newly added service.

5. Creating a Web service client
5.1 Select File --> New --> Other… and choose Web Service Client

5.2 Set he newly created Axis2 Web service (http://localhost:8080/axis2/services/FirstWebService?wsdl) as the Service definition. Then configure the Server runtime as previously and click finish.

5.3 This will generate two new classes called FirstWebServiceStub.java and FirstWebServiceCallbackHandler.java. Now we can create test class for client and use our web service. Create new class called TestClient.java and paste following code.
package com.sencide;

import java.rmi.RemoteException;
import com.sencide.FirstWebServiceStub.AddTwoNumbers;
import com.sencide.FirstWebServiceStub.AddTwoNumbersResponse;

public class TestClient {

 public static void main(String[] args) throws RemoteException {

  FirstWebServiceStub stub = new FirstWebServiceStub();
  AddTwoNumbers atn = new AddTwoNumbers();
  atn.setFirstNumber(5);
  atn.setSecondNumber(7);
  AddTwoNumbersResponse res = stub.addTwoNumbers(atn);
  System.out.println(res.get_return());

 }
}
Now you can run the above code as java application and you will get the output as 12 since we are adding 7 and 5. Download the Eclipse project of the above example (Password:sara)